Report Tab
 MAIN REPORT LIST
- From the Appointment Screen select “Report Tab”
EDB list (Estimated Date of Birth) 05
Active Patient List
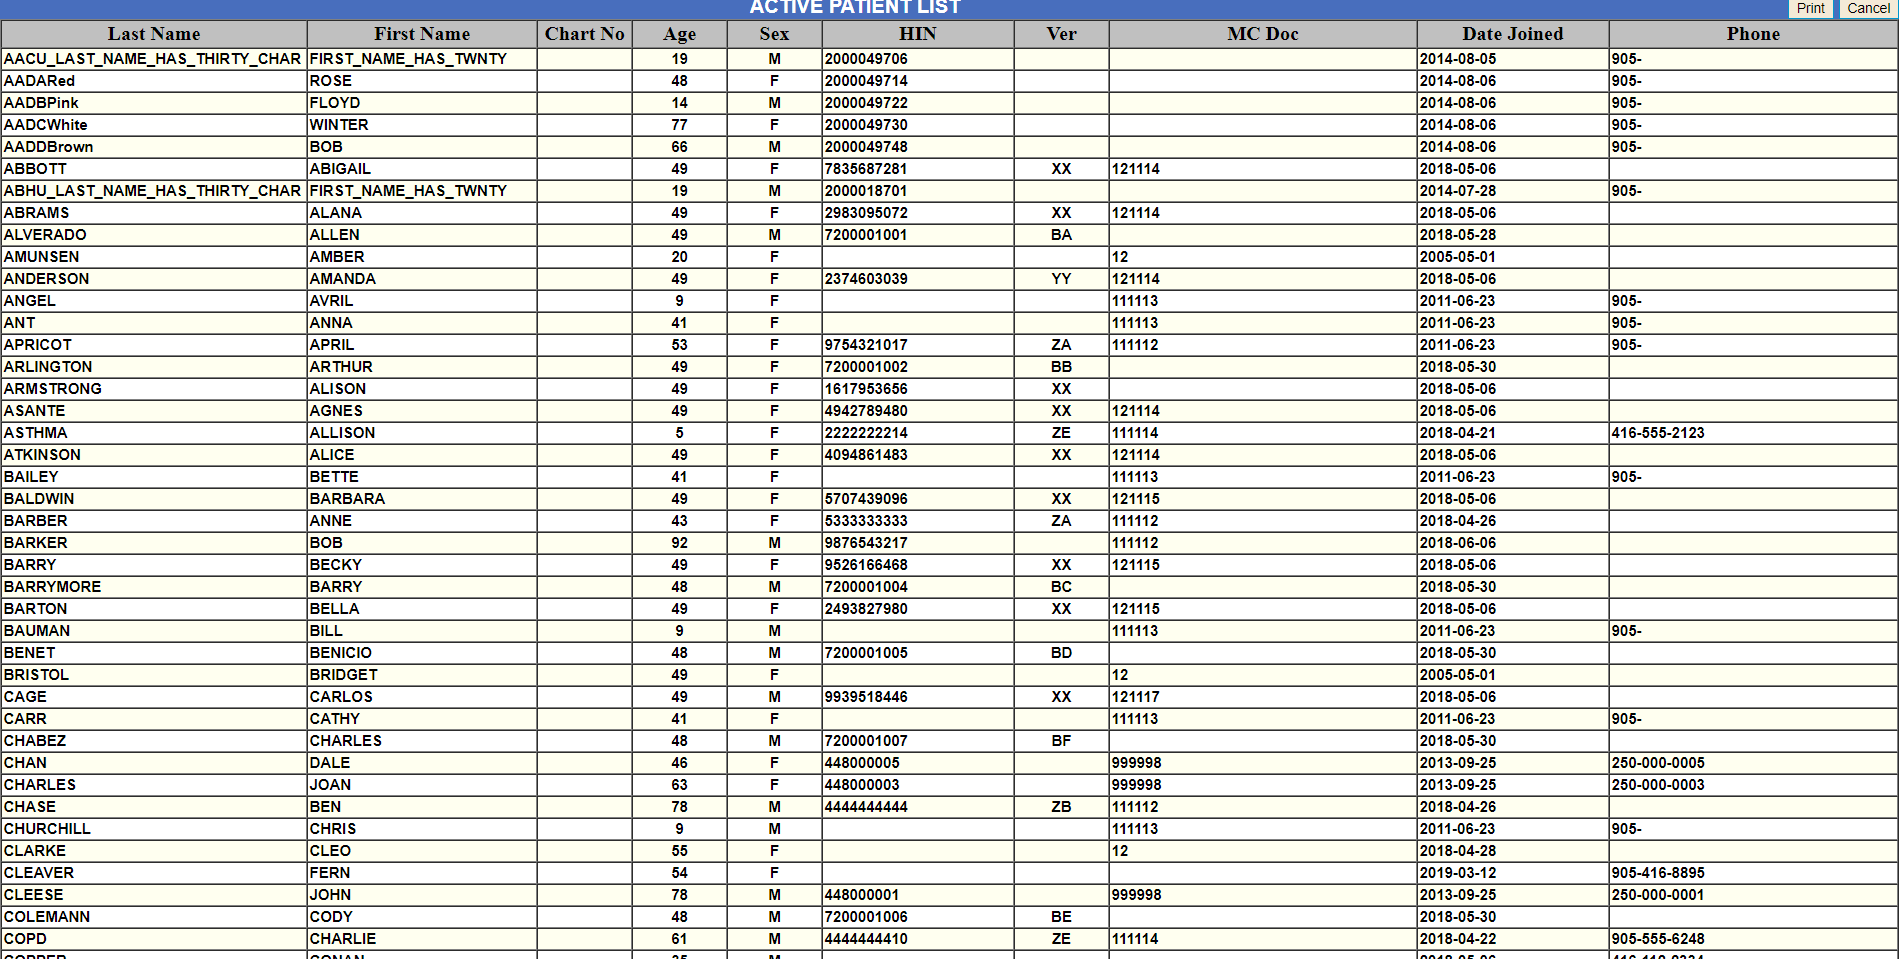 Shows active patient list.
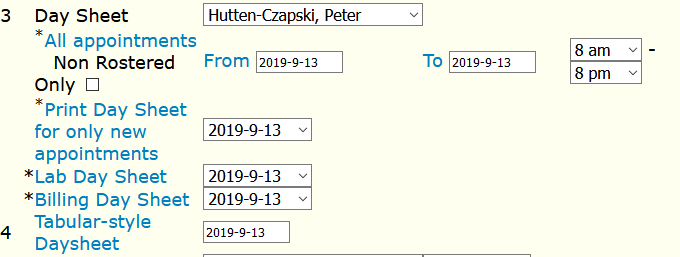
Day Sheet
- From the Billing screen select Reports
- From the drop down list, select either the desired doctor, group of doctors or ‘All Doctors’
- Next select the time range and date range.
- Click on “All appointments” or “Non Rostered Only” for a list of every appointment within the time and date range selected. OR click “Print Day Sheet for only new appointments” for a list that only includes appointments made after the last day sheet was printed
Once generated the Appointments screen will be modified to open the closed folder be beside each booked appointment, signifying that the Day Sheet has been printed
Notes:
- Hovering over the Appointment time will give the scheduled end time for that consultation
- The report can be sorted by each of the column by clicking on a header
- The Print button lets you print the displayed page
Lab Day Sheet
- The Lab Day Sheet Prints out all appointments for all providers on the date against a grid for gynecology blood work. PDF only
Billing Day Sheet
 For billing purposes, again more Gyn centered and PDF output
Tabular Day Sheet
- This gives another style of day sheet for appointments for the date and provider specified.
- Once you add the version and billing code and diagnosis this sheet will give all the information necessary if you are using a separate billing program or are handing it to a receptionist to bill in OSCAR
- From the Schedule Screen click on the Report Tab
- Choose the date you would like to have the report for
- Click Tabular-Style Daysheet
- Your report will generate as a separate pop up page
Bad Appt Sheet
This report is used to find appointments that have gotten lost in the system because the start time was left blank caused by an entry problem.
- From the Main Schedule Page choose the Report Tab
- Select the provider & the date
- Click on ‘Bad Appt Sheet’ hot link to create the report
- Click on the PRINT button to print the report and search for the appointment to correct the error
Patient Chart List
This report will provide you with a list of the Doctor’s Patients as well as their Chart Number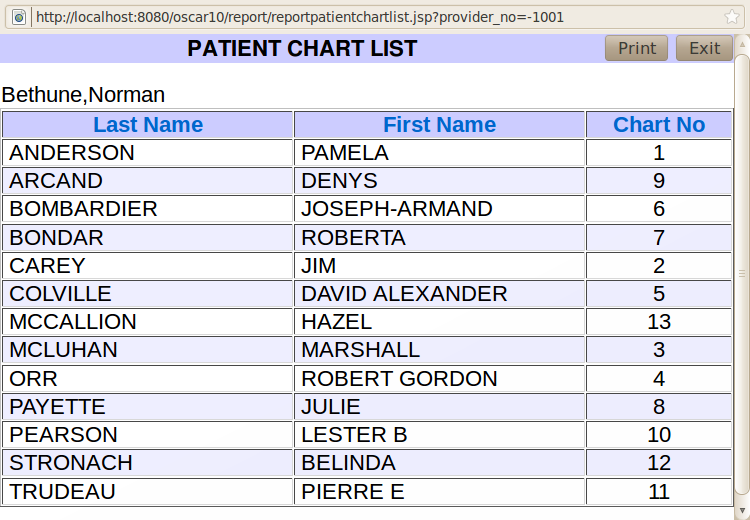
- From the Main Schedule Screen choose the Report Tab
- Select the provider from the drop down list
- Click on the ‘Patient Chart List’ hot link to produce a patient list for the selected provider
TIP: Click on a heading to sort the list on that value
Old Patient List
This report is a snapshot of the data base that is updated on a routine basis for the purpose of creating patient lists with an age qualifier.
- From the main schedule screen click on the report tab
- Select the provider from the drop down list
- Enter the age that you wish to be the lower age limit for the list (i.e. all patients will be older than the age you enter)
- Click on the ‘Old Patient List’ hot link to produce a patient list for the selected provider
No Show List
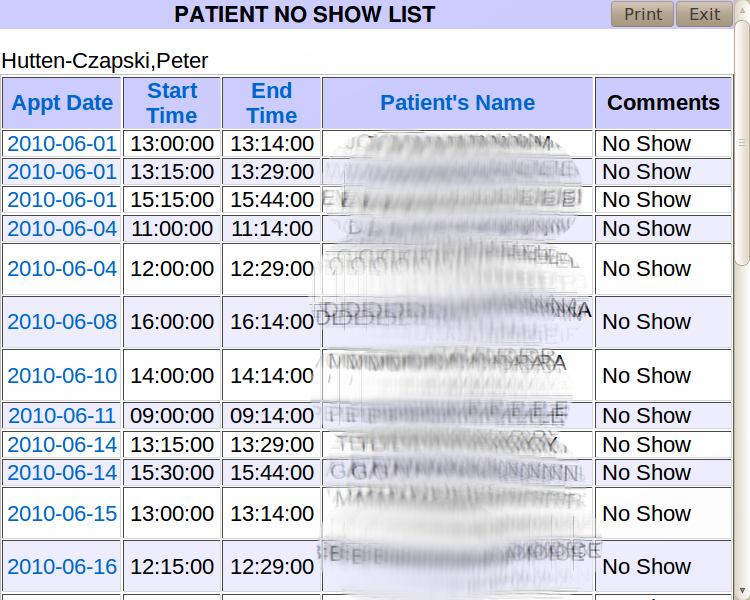
This report can be used to print a list of patients who did not show for their appointments.
-
- From the main schedule screen choose the report tab
- On report 8 select the provider & the date
- Click on the ‘No Show Appointments List’ hot link to create the report
- A report will be generated that shows Appointment Date, Start and End Time, Name and any Comments listed.
- Click on the date link for details of that appointment booking
- Click on the PRINT button to print the report
Consultation Report
This report gives a list of requested consultations and their status and linked documents
- From the main appointment screen click on the report tab.
- Click Consultation Report on the list
- Select the number of months from the drop-down menu (1 month – 12 months)
- Select the provider from the drop-down menu
- Click ‘UPDATE REPORT’
TIPS:
- Clicking the date link opens the consultation request
- Clicking on the document description opens the document
Lab Requisition Report OUTDATED
This report provides shows only old style OHIP laboratory requisitions for a date range and for selected providers. It remains for managing older data. OUTDATED
- From the schedule Screen click on the report tab
- Click Laboratory Requisition Report
- Select the number of months from the drop-down menu (1 month to 12 months)
- Select the provider from the drop-down menu
- Click UPDATE REPORT
Demographic Report Tool
When done a display will show with the criterea used at the top and then a chart with total patients and a % up to date followed by a list of demographics. Hmm looks like only John A McDonald has has his shot and its time to call in William McKenzie King, Louis St Laurent and R.B. Bennett.

Demographic Set Edit
If you have saved patient sets from the Demographic Report Tool, you can view the list here, as well as mark certain patients as ineligible or take them off the list (ie: if you are using this list to generate names of possible study subjects).
- From the appointment Screen click on the Report Tab
- choose report #13 – Demographic Set Edit
- Select the patient set you wish to edit
- Click Display Set
- Use the check boxes to select patients.
Notes:
- Click Delete to take the patients off of the list or Set Ineligible to mark them as such for calculations
- You can delete the whole set by choosing delete set and then proceed with answering Yes
Ontario Prevention Report
- The prevention report draws on the information from the Preventions modules in each patients chart.
To determine the status of standard interventions in any given patient set that you defined in Demographic Report Tool follow the directions below:
- From the appointment screen choose the report tab
- Select report 14 – Prevention Report
- Choose the Patient Demographic Query
- Select the Prevention
- Set the Date
- Click Submit
NOTE:
- Patient results are colour coded by prevention status. A link to the master record of each patient is provided as a convenience.
- Letters can be generated by clicking on the link(s) provided below the list
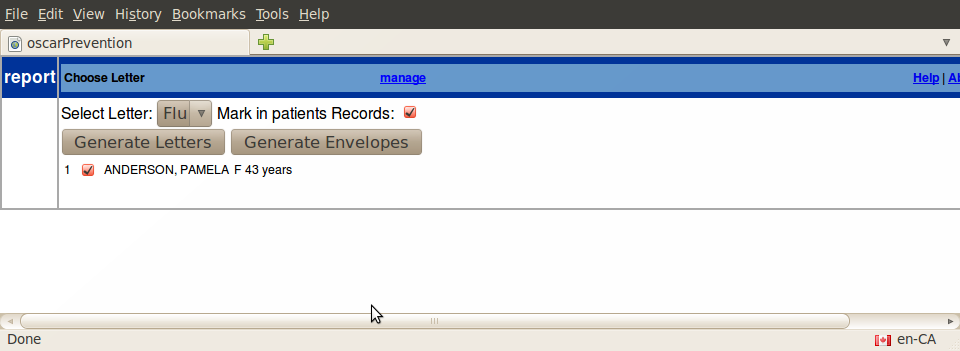
Generate Letters
- The “Generate First Letter” link will lead you to the following screen

Select the appropriate Letter Template from the drop down list
- Leave the default setting to put a copy of the letter in patients chart as a eDocument
- Un check any patients for whom you do not want to generate a letter
- Click on ‘Generate Letters’ to get a mail merge composite pdf of all the letters. This will also update the measurement type, indicating that a letter was sent on this date, and a copy of the letter is filed in the patients chart under documents.
- Click on ‘Generate Envelopes’ to get a mail merge composite pdf of all the envelopes
Manage Templates
- The template can be loaded through the “manage letters” link which leads you to the following screen.
- The program accepts Jasper Reports templates that can be generated with iReport v 2.05 or made up manually in a text editor from tweaks to existing templates such as the Generic Flu recall letter template.
To load your new template simply:
- Select a Jasper template on your hard drive, in this case flu2010Generic.jrxml
- Give the report template a descriptive name, in this case Flu 2010
- Click “Submit Query” to upload the template and if the template is valid it will be added to the list of templates displayed
NOTES:
- The templates are listed by the user number who saved them, the template name, the file name, and the date saved
- Click the templates file name in the list to download it so that you can tweak it
- Click “del” to delete templates that are no longer in use
Demographic Study List
This report gives you a list of patients in any study’s being conducted in the clinic.
- From the Appointment screen choose the report tab
- Click ‘Demographic Study List’ link
- Click on a patient’s last name to view their Patient Detail Record, or “Print” to print the list
Chronic Disease Management
Provides a list of patients who meet report parameters for chronic disease management.
- From the main Appointment screen click on the Report Tab
- Select the Chronic Disease Management report
- Select the CDM group you wish to look at from the drop down menu.
- Click the ‘Continue’ button beside the statistic you wish to view. Your choices are:
- Percentage of patients who met guideline
- Percentage of patients in abnormal range
- Frequency of relevant test being performed
- Select the tests and guidelines you wish to see in the report, as well as the date range of the report.
- Click ‘Generate Report’.
- You can print the report that is generated.
Waiting List
Form Report OUTDATED
The Form Report’s features will give you the ability to create study reports on any of the forms from the Encounter screen. Each form report needs to have captions added to the database field names, as well as the fields of the database you would like in the report. As most forms have been replaced by eforms this functionality is outdated
- From the main appointment screen select the report tab
- Click on Form Report
- Type the title of the report you want to add and then select ADD
- you have 2 options to view the report [Report in HTML] or [Report in CSV]
NOTE:
- Report in HTML for a report that will display in OSCAR
- Report in CSV for a report that will display in spreadsheet programs such as Open Office
- 1 in the report means = yes; 0 in the report means = no
SCBP Demographic Report
The SCBP Demographic Report reports on BC antenatal charts
- From the main appointment screen, choose the report tab
- Choose the SCBP Demographic Report
- Select the data that you need the report to be about. There are 2 different sections. Data Field and Limitation.
- Choose which format that you want to see your report in, either HTML or CSV
Clinical Report
The Clinical Report allows you to evaluate and monitor how well the Practice is treating their/your patients by picking a test value of significance (‘Numerator’) and comparing it to a denominator.

- From the main schedule screen select the Report Tab
- Select Clinical Report
- Select your numerator
- Select your denominator
- Select your fields to include
- Select evaluate
- Choose to export your findings to either CSV or XLS
Injection Report
A reporting tool for the injections that have been given in the practice.
- From the main schedule screen choose the report tab
- Choose the Injection Report
- Enter the start date
- Enter the stop date
- Select the injection type for the pull down menu
- Run report
- The results will populate on the page, you can print the results also
OSIS Report
This report is called off streets into shelters (OSIS), it is a report based off of a Hamilton Public Health eForm
- From the main schedule screen choose the report tab
- Choose OSIS Report
- Select your start date
- Select your end date
- select the providers that you need to run the report for
- Run Report
One Time Consult CDS Report
Is a report based off of a Hamilton Public Health eform for one time consultations
- From the main schedule screen choose the report tab
- Choose the Consult CDS Report
- Select your start date
- select your end date
- Select your Providers that you would like to see on your report.
- Run Report
Report by Template
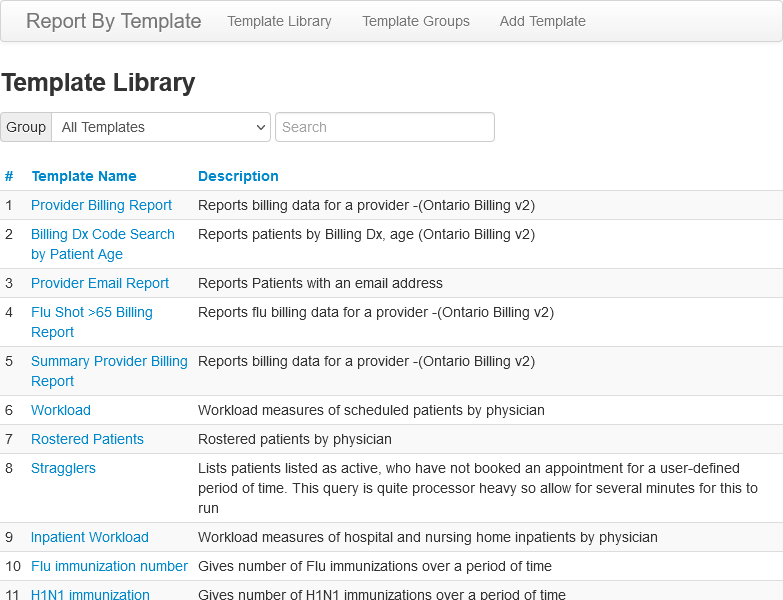
Report by Template is a powerful query engine that allows for non technical people to run standard reports. Click on the template name you want to run.
Instructions on managing Report Templates is here.
Documentation copyright © 2012-2021 by Peter Hutten-Czapski MD under the Creative Commons Attribution-Share Alike 3.0 Unported License


