
Installation of OSCAR 19 on Debian Bullseye
Preface
At the time of this writing these instructions are mature and are an ALTERNATE albeit less traveled option to the standard production Ubuntu installation (currently 22.04)
This basic install is adequate for a local install of OSCAR with scripted encrypted backups and Secure Socket Layer technology.
Document Version History
- v1.0 – initial OSCAR 19.5 version published for Bullseye 11.2– 2022-01-30
- v1.1 – promoted instructions to production ready for Bullseye 11.6 – 2022-12-28
- v1.2 – updated instructions to alter tomcat9.service override for allowed read writes – 2022-12-28
Documentation Copyright © 2022 by Luiz Rufato and Peter Hutten-Czapski MD under the Creative Commons Attribution-Share Alike 3.0 Unported License
Prerequisites
It is assumed that:
- You have the time. Allow a minimum of 30 minutes to install Debian, 11 minutes to install the infrastructure packages, and a final 15 minutes to install OSCAR itself. Downloading the software adds additional time and is dependent on your connection and can take 20 additional minutes @150KB/s.
- You are using suitable hardware. While the OSCAR server may run on recent CPUs with 2GB RAM I consider 3GB a minimum. I suggest aiming to consumer grade machines with 8GB RAM for 1-3 MD’s increasing to server grade machines with 32GB for 7+ MD’s. Server grade machines offer component redundancy and improved reliability that is an advantage in any setting, but all systems need contingency plans for hardware failure. The author runs Intel Xeon server with 72GB RAM and hardware RAID as well as a i7 backup server with 16GB RAM for a database that is 8GB (compressed) in size and has 24 users.
- We do not assume you are using a virtual machine (VM) but we recommend it for enterprise level equipment. A virtualization environment (hypervisor) allows you to install one or more servers as virtual machines (VM) to improve security and ease maintenance. When provisioning the VM consider that the base install of Ubuntu and OSCAR will need about 15 GB.
- You have installed the latest Debian Bullseye 11.6 in a basic mode with only “SSH Server” and “Standard system utilities”.
- You have a basic level of Linux knowledge and you can open a Linux terminal
- You can cut and paste EXACTLY the following instructions (These instructions are sensitive to spelling packages and order. )
- There are significant disadvantages of trying ANY other version of the software versions specified herein unless you have extensive OSCAR configuration experience. Better to get it running on spec and only then try something a bit different.
NOTE: Firefox will copy with Control+C while a Linux terminal requires Shift+Control+V for paste
Installing The Infrastructure Packages
WE REITERATE Its a noobe error to deviate from these instructions in favour of something newer or “easier.” For production use we recommend these exact instructions as the community to support you if you are having problems. If you are both familiar with OSCAR and are testing or are willing to take chances when you colour outside the lines feel free to deviate from the instructions as you wish (review the version notes at the bottom), and if its substantive deviation (and it works), please submit back your version.
Log in as root, adjust your /etc/sources.list to allow a broader selection of software:
echo '
deb http://deb.debian.org/debian bullseye main contrib non-free
deb http://deb.debian.org/debian bullseye-updates main contrib non-free
deb http://deb.debian.org/debian-security bullseye-security main contrib non-free
' > /etc/apt/sources.list
And then, update repository sources and system packages:
apt update && apt full-upgrade -yNow all the infrastructure packages can be installed at conce
apt install -y openjdk-11-jdk mariadb-server mariadb-client libmariadb-java tomcat9 ufw wkhtmltopdf unzip curl pgpgpg
OPTIONAL components
Note if you don’t use Certbot the Deb installer will still configure a secure https connection for you with a self signed certificate. Use Certbot it you have a fully qualified domain name FQDN (I mean you own your website name eg www.example.com).
Certbot
Certbot will register your server with Lets Encrypt so that external browser access to the OSCAR will be with a green padlock for a trusted connection.
To install certbot execute the following
sudo apt install certbotCertbot sets up a temporary standalone webserver that needs to communicate on port 80 to the lets encrypt server to authenticate that you are the owner of the website. If your server is behind a router/firewalls you will need to open port 80 on your router and forward that port as port 80 on your server. Those instructions vary by router. In the following replace FQDM with your the fully qualified domain name that you own (eg www.example.org)
sudo certbot certonly --standalone -d FQDNTest by checking if there are files as below
sudo ls /etc/letsencrypt/live/FQDN
cert.pem  chain.pem  fullchain.pem  privkey.pem  README
The OSCAR Deb installer will install the certificate for you when it runs.
Setting up the firewall
At this time open connections to Tomcat and SSH ports. Remember to enter “y” to enable firewall immediately with this settings.
$ sudo ufw allow OpenSSH
$ sudo ufw allow 8443
$ sudo ufw enable
Maria DB
This script will make your MariaDB settings a bit more secure. Answer NO to “Switch to unix_socket authentication” and “Change the root password?”. All other options can be answered with YES.
We will take care of MarisDB password on next step.
$ sudo mysql_secure_installation

Switch to unix_socket authentication [Y/n] N
Change the root password?
 [Y/n] N
Remove anonymous users? [Y/n] Y
Disallow root login remotely? [Y/n] Y
Remove test database and access to it? [Y/n] Y
Reload privilege tables now? [Y/n] Y
This next line will disable socket authentication and set up a desired password, which will be used later on OSCAR database installation script. Feel free to use numbers and letters in your password. Take note of it. If you proceed with the complication of using symbols “#,!, &,*, (, ), / , \ and $” in this password (e.g. pass&word), you must provide the password encased in quotes and/or escape these characters
mariadb -e 'ALTER USER root@localhost IDENTIFIED VIA mysql_native_password USING PASSWORD ("DESIRED-PASSWORD");'For now on, system will no longer login on database automatically. This syntax will be required in case you need to manually login on your MariaDB instance, note about use quotes on -p argument for better compatibility with more complex passwords:
mariadb -uroot -p"pass"Preparing for OSCAR
The following tweaks to the base Debian are currently necessary. First create a symlink to the newer tomcat version so that the OSCAR property files can be found
$ ln -s /var/lib/tomcat9 /var/lib/tomcat
Set an exception for Debian’s Tomcat sandbox implementation to allow OSCAR to access its document directory
Probably best to do it in /etc/systemd/system/tomcat9.service.d/override.conf
sudo systemctl edit tomcat9.service
Edit in the following lines in the space below ### Anything between here and the comment below will become the new contents of the file
[Service]
ReadWritePaths=/usr/share/oscar-emr/
As its in the override it should survive a tomcat update.
To activate you need to reload systemctl
systemctl daemon-reload
systemctl restart tomcat9.service
Installing OSCAR
Download the OSCAR deb package from Sourceforge. There are several to choose from.
The naming format is oscar_emr{OSCAR_VERSION}-{DEB_VERSION}~{BUILD}.deb
- OSCAR is now a rolling release and no longer goes through beta stages
- We recommend the latest OSCAR 19 release for production
- Note that stability is not necessarily improved by a higher build number.
- If you are experiencing bugs, try either upgrading to a higher number build (the last 4 digits of the deb’s name) that incorporates the fix, or downgrading to an earlier deb that does not have the problem.
All are at http://sourceforge.net/projects/oscarmcmaster/files
The following version is the FIRST one that is supported to install on Debian Bullseye. The latest filename or path may be slightly different than exampled below.
wget https://sourceforge.net/projects/oscarmcmaster/files/Oscar\ Debian\+Ubuntu\ deb\ Package/oscar_emr19-52~1691.debNow simply run the package and follow the instructions
sudo apt install -y ./oscar_emr19-52~1691.debThe deb will provide feedback as to what it is doing however if you want more verbose details open another terminal window and invoke
tail -f /usr/share/oscar-emr/Oscar19install.logNew installs get the following install screens. (for upgrades see Appendix 1 below)
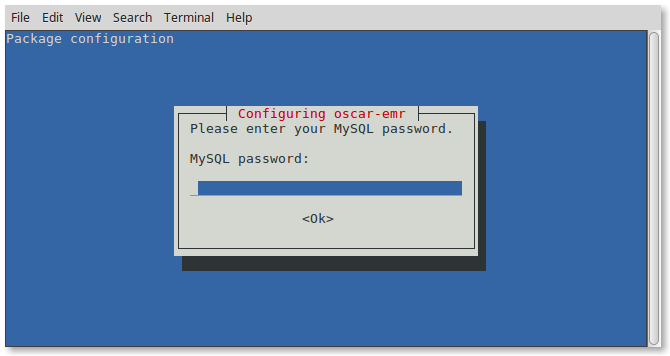
Start by providing the MySQL/MariaDB password you assigned.
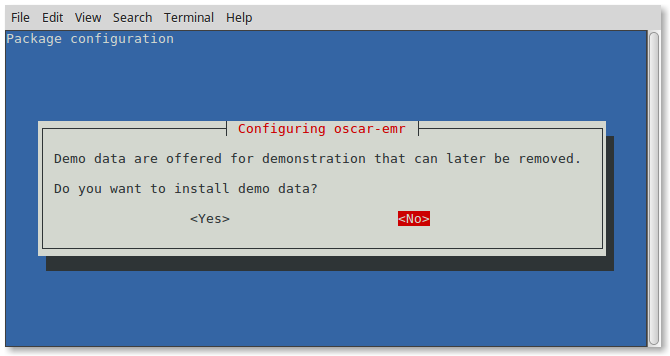
This window will give you the option to populate the database with a demo patient with which to develop familiarity with OSCAR. You can remove the demo data later with the following (replace ****** with your MariaDB/Mysql password, escaping any symbols (if any) that you used in the password).
mysql -uroot -p"*******" oscar_15 < /usr/share/oscar-emr/undemo.sql
While customary production settings will be applied, they can be changed manually through editing /usr/share/tomcat9/oscar.properties in your favorite text editor. Note that OSCAR/Tomcat need to restart whenever the properties file is modified, to have the settings take effect.
The terminal will provide feedback as OSCAR is assembled and configured.
Selecting previously unselected package oscar-emr.
(Reading database ... 1460065 files and directories currently installed.)
Preparing to unpack oscar_emr19-52~1691.deb ...
Unpacking oscar-emr (19-52~1691) ...
Setting up oscar-emr (19-52~1691) ...
NOTE: Picked up JDK_JAVA_OPTIONS:  --add-opens=java.base/java.lang=ALL-UNNAMED --add-opens=java.base/java.io=ALL-UNNAMED --add-opens=java.rmi/sun.rmi.transport=ALL-UNNAMED
Tomcat 9 already has read write on /usr/share/oscar-emr
Setting initial defaults for areacode 705 in ON
 [x] Checking the MySQL password  success
 [x] Determining locale  success
 [x] Creating the new oscar_15 database  success
 [x] Expanding War files success
 [x] Populating database with ON data  success
 [x] Populating database with OLIS data  success
 [x] Patching database to very latest schema success
 [x] Populating database with Demo data  success
 [x] Configuring Tomcat  success
 [x] Creating Drugref2 Property Files  success
 [x] Updating drugref database  success
 [x] Applying TallMAN rules to drugref  success
 [x] Installing Ontario Specific eForms  success
 [x] Installing HRM xml files  success
 [x] Installing Ontario Rourke eForm under licence  success
 [x] Restarting Tomcat  success
Successful installation of oscar deb revision 49~1508
Login at https://localhost:8443/oscar
Your username is oscardoc
Initial password mac2002
second level password (pin) 1117

Login at https://localhost:8443/oscar
Your username is oscardoc
Initial password mac2002
second level password (pin) 1117
Allow for a good quarter hour for the deb to run. Once Tomcat restarts you will be given back the prompt.
You can read the readme!
less /usr/share/oscar-emr/README.txtTrying It Out
At this point you have a fairly plain install. To test the connection, click on the link displayed on the output above or open your web browser and type in the address manually. While most new browsers (Chrome, Safari, Edge etc) will work, for production use we strongly recommend FireFox ESR version, for stability, for tested OSCAR features and a large number of grease monkey addons that you can get on these pages. Did I mention Firefox is open source and doesn’t sell your data?
Whatever browser you choose you should see the OSCAR login page with clicking on one of the following links.
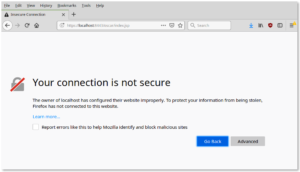
In most cases you will be prompted to reach your SSL secured OSCAR server at https://localhost:8443/oscar .
Firefox will complain with an “insecure connection” error as the certificate is either self-signed, or it is a proper certificate but accessed on the local network and not on what you supplied for the FQDN (www.something.org) . As it is your installation you can safely click on “Advanced” and set an exception and proceed to your OSCAR server.
Sometimes you get an Apache Tomcat error page indicating that the resource (oscar) is not available. This usually will occur if you have inadequate memory allocated (see above for minimum and suggested provisioning).
Rarely if the installer was unable to configure SSL for you, the deb will warn you that your installation may be INSECURE but will work at http://localhost:8080/oscar
In the latter case, if you had not already done so please manually secure your Oscar server using standard instructions for hardening for Tomcat 9 provided by Apache and others on the web.

The initial login parameters for OSCAR are as follows:
User Name: oscardoc
Password: mac2002
PIN (Second Level Passcode): 1117
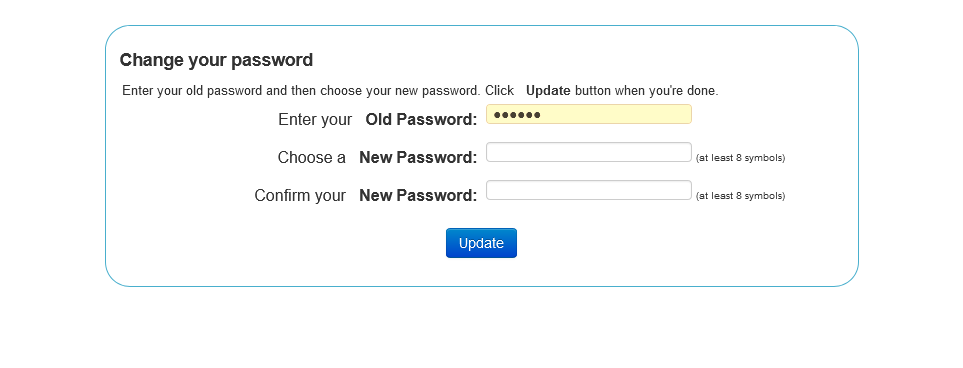
When you login, you will be presented with a one time password reset for security purposes.
8 characters upper and lower case numbers and symbols are required in a password with default oscar.properties settings
You have successfully installed a plain OSCAR and you can start playing with it.
Version Notes
The above is tested as the default installation that works with the DEB. Certain variations are supported, some of which are mentioned here. Everything else is not tested and will likely require more time than you think to get it to work (usually accomplished by backtracking to the above tested methods)
See the article on software and versions for variations and considerations when using other software as well as duration of open source security patches with end of life dates for various components of the OSCAR stack.
For finishing security touches see the second article in this series
Troubleshooting
Note that Tomcat 9 is only newly supported. Early DEB’s are likely to fail on one or several grounds that have been fixed in current DEBs. If you need an older DEB the solution may be to install the latest and then downgrade the WAR to the one in the earlier WAR by installing the old DEB over the successfully installed new DEB.
- Database errors. MariaDB 10.5 uses strict mode. Some early databases have definitions that are not supported
- Cache. OSCAR is huge and requires a lot of caching. Newer debs set context.xml <Resources cacheMaxSize=”102400″ />
- Access to custom directory. To access OSCAR files the tomcat9.service has to have an entry ReadWritePaths=/usr/share/oscar-emr/
For migration from OSCAR 15 see the section on updates and migrations