
Search the OSCAR Documentation
eDoc
Need to add documents into OSCAR? 3 different options
- Upload a document via the eDoc tab. These will be files for your personal use or documents such as contact lists that the whole office can use.
- Attach files to the patient’s electronic medical file
- Batch upload in the Inbox
eDOC Tab

- From the main screen select eDOCS and click ‘Add Document’ on the upper right corner of the screen.
- Select the Document you are going to upload by using the Choose File button. Also complete the Select Type, Public or Not Public, a Title, Date, Report Class and Report SubClass.
- When you are back at the “Add Document” screen click on “SUBMIT” to add the file

NOTE:
- If you select ‘PUBLIC’ everyone in your office will have access to this file. This option is great for contact lists and schedules.
- If you select any of the other document types, the program will sort the documents into either resource, desktop, handout or forms in your eDoc tab. These documents will only be accessible when you log into OSCAR and not for the general office. Others will not see these documents in the eDoc tab when they log in.
- Clicking on ‘BROWSER’ opens the eDoc browser
Patient’s eChart

- For the PATIENT’s e-Chart the screen is slightly different and has different document types and attach to a given patient

- From the patient’s eChart select the ‘documents’ link on the left side of the e-Chart screen. Click “Add Document”. This is located on the upper left hand sign of the screen.
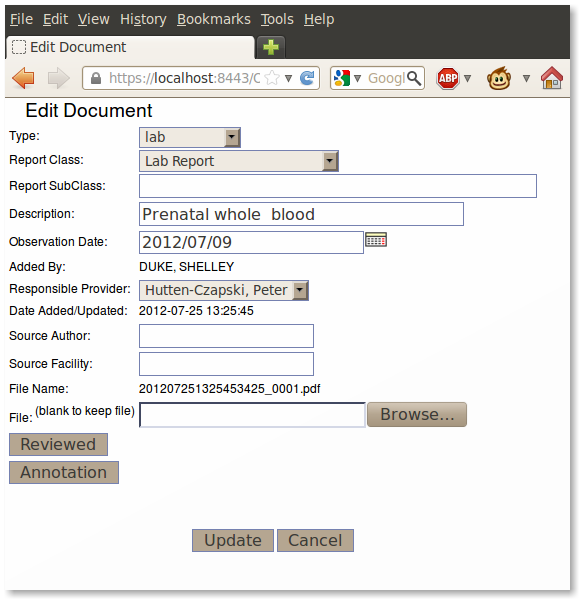
- Select the Document you are going to upload by using the Choose File button. Also complete the Select Type, a Title, Date, Report Class and Report SubClass.
- When you are finished Select “Add” and “Done – Close Window”

Batch Upload thru the Inbox
The Document Upload link connects you to a file selection window that will upload your files to the inbox.
- Select the Queue or Provider from the drop downs
- You can select multiple files at once with the file selector opened by the ‘Browse’ button
- Files scheduled for upload are displayed, with a thumbnail of graphic files.
- Simple file errors are highlighted
- Click ‘Start Upload’
- Progress bars will appear as the files upload to the inbox

Browser
A document browser is available to browse, filter, edit and delete documents and their annotations
Configuration for the Document Browser
- The document browser is enabled in providers preferences. Simply check off “enable Document Browser”
- You need to have a PDF Viewer add on installed in Firefox
- You can then access the browser from the patients Master Record
Browsing the Documents
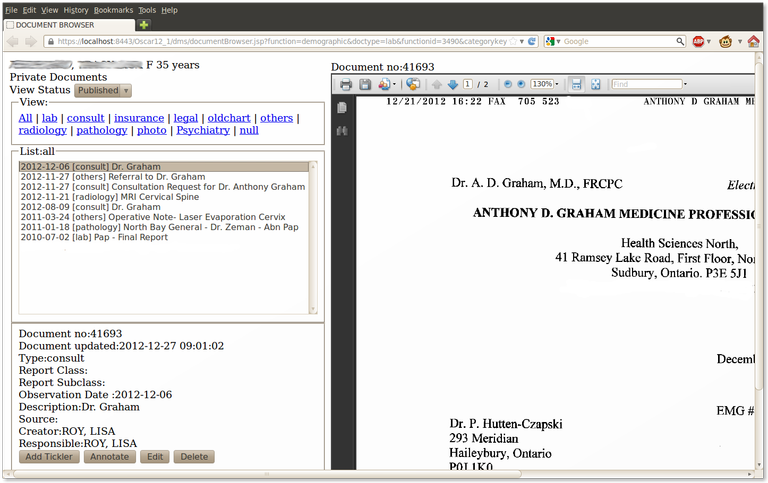
The View selections allow you to filter the documents by Status and by Type
The document will appear in the right pane
You can Edit the metadata and/or upload a corrected document
MANAGEMENT TIPS
- For documents that need to be scanned: scan documents first into a local folder with a short name. Then upload each scanned document giving more explanatory names in the ‘Display Name’
- Best text files to add: PDF (Acrobat file), RTF (Rich Text Format) or html file.
- Best type of picture file: JPG – GIF – BMP – PNG or TIF
MIGRATION TO ELECTRONIC FORMS & NOTES
- Small handwritten records on scraps of paper in the file, like home visits or nursing home visits, are typed in as an encounter note, date of the note entered and then “Sign, Save & Exit”.
- The “Reason” field, which will automatically come up as ‘Tel-Progress Note’ should be changed to the type of document required (e.g. ER visit on 2001/10/2).
- The actual encounter note will simply be a short summary (e.g. otitis media, Rx Amoxil 250 TID / 10 days)
- File the papers with the scanned documents in an archived box, in chronological order and keep for legal purposes for the required 10 years.
copyright © 2012-2021 by Peter Hutten-Czapski MD under the Creative Commons Attribution-Share Alike 3.0 Unported License