
CARLOS manual installation
Preface
This basic install is adequate for a local install of CARLOS with scripted encrypted backups and Secure Socket Layer technology. Until this notice is removed it is considered EXPERIMENTAL and should not be used in production. Sample outputs would be current at the time but may have changed subsequently.
Document Version History
- v0.1 – Initial instructions for LTS Ubuntu 26.04 daily build – March 23, 2026
Documentation Copyright © 2012-2026 by Peter Hutten-Czapski MD under the Creative Commons Attribution-Share Alike 3.0 Unported License
Prerequisites
Check that:
- You have time to spare. Downloading the Ubuntu ISO will take half an hour at 2 MB/s. Allow a minimum of 30 minutes to install Ubuntu, 15 minutes to install the infrastructure packages, and another 45 min to compile, configure and install the war files.
- You are using suitable hardware. If you plan to migrate to production after testing on the same machine I suggest aiming to mid to high end consumer grade machines with 8GB+ RAM for 1-3 MD’s increasing to server grade machines with 32GB++ for 7+ MD’s. Server grade machines offer component redundancy and improved reliability that is an advantage in any setting, but all systems need contingency plans for hardware failure.
- We recommend virtualization for enterprise level equipment. A virtualization environment (hypervisor) allows you to install one or more servers as virtual machines (VM) to improve security and ease maintenance. When provisioning the VM consider that the base install of Ubuntu and OSCAR will need about 15 GB and should have 4GB RAM allocated at a minimum for testing.
- You have installed the 26.04 64 bit LTS version of Ubuntu Resolute Racoon either natively or as a VM. The desktop version is slightly easier to debug for testing and the server version is “lighter” and more suitable for production. Both are publicly supported by Ubuntu to April 2031 and with inexpensive subscription to 2036.
- For use with any patient data, if you are able to manually provide the password after a power outage or reboot, we strongly recommend configuring Ubuntu for *full disk encryption* which will mitigate the privacy breech that occurs with physical theft of the server.
- You have a basic level of Linux knowledge and you can open a Linux terminal
- You can cut and paste EXACTLY the following instructions (These instructions are sensitive to spelling packages and order. )
- There are significant disadvantages of trying ANY other version of the software versions specified herein unless you have extensive OSCAR configuration experience. Better to get it running on spec and only then try something a bit different.
NOTE: Firefox will copy with Control+C while a Linux terminal requires Shift+Control+V for paste
Installing The Infrastructure Packages
WE REITERATE It’s a newbie error to deviate from these instructions in favour of something newer or “easier.” For production use we recommend these exact instructions as the community can support you if you are having problems. If you are both familiar with OSCAR and are testing or are willing to take chances when you colour outside the lines feel free to deviate from the instructions as you wish (review the version notes), and if its substantive deviation (and it works), please submit back your version.
Java 21, 25
Java is the language all OSCAR type programs are written in. In Ubuntu 26.04 you have the option of many Java’s but CARLOS requires Java 21 or higher. Lets go for Java 25 which is the default
sudo apt install default-jdk
You can test by the following java -version
openjdk version "25.0.3-ea" 2026-04-21
OpenJDK Runtime Environment (build 25.0.3-ea+5-Ubuntu-2)
OpenJDK 64-Bit Server VM (build 25.0.3-ea+5-Ubuntu-2, mixed mode, sharing)
The actual subversion of Java is not important and may differ from what is seen above
NOTE: If you have multiple javas installed, Tomcat may not necessarily be picking up the system version if another Java is listed for JAVA_HOME in /etc/default/tomcat11
Tomcat 11
Tomcat presents CARLOS’s webpages to your internet browser from the Universe repository.
.deb packages (via apt) is the recommended method for system-wide installation, service management, and automatic updates, avoiding the manual setup of tarballs.sudo apt install tomcat11Test by pointing your browser at http://localhost:8080 For a headless server you can test by installing a non graphical browser such as lynx. Otherwise test from another machine by replacing localhost with the IP of the server.
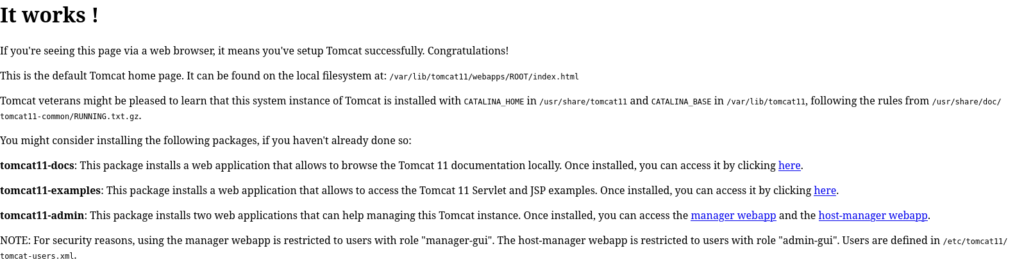
If you don’t get a welcome screen then it is likely that Tomcat is not picking up your java.
Configure Tomcat for Https access with SSL
At the moment all traffic to and from Tomcat is in plain text. Best practice is to encrypt the personal health information (PHI) traffic. For that tomcat needs a keystore containing your certificate. For development, create a self-signed certificate (alternately follow the certbot instructions below). Change the password (changeit below) to match your planned configuration:
sudo mkdir -p /etc/tomcat11/ssl

sudo keytool -genkey -alias tomcat -keyalg RSA -keysize 2048 \

-validity 365 -keystore /etc/tomcat11/ssl/tomcat.keystore \

-storepass changeit -keypass changeit
Edit the main Tomcat configuration file to uncomment and update the SSLHostConfig section with the certificate details
sudo nano /etc/tomcat11/server.xml
Locate the <!-- Define a TLS HTTP/1.1 Connector... --> section and add/update the following
<!-- Define a SSL Coyote HTTP/1.1 Connector on port 8443 -->

<Connector port="8443" protocol="org.apache.coyote.http11.Http11NioProtocol"

maxThreads="150" SSLEnabled="true">

<SSLHostConfig>

<Certificate certificateKeystoreFile="/etc/tomcat11/ssl/tomcat.keystore"

certificateKeystorePassword="changeit"

certificateKeyPassword="changeit"

type="RSA" />

</SSLHostConfig>

</Connector>
To redirect http traffic to https edit /etc/tomcat11/web.xml and add this before the </web-app> tag
<security-constraint>

<web-resource-collection>

<web-resource-name>Protected Context</web-resource-name>

<url-pattern>/*</url-pattern>

</web-resource-collection>

<user-data-constraint>

<transport-guarantee>CONFIDENTIAL</transport-guarantee>

</user-data-constraint>

</security-constraint>
Ensure the Tomcat user can read the keystore, then restart
sudo chown -R tomcat:tomcat /etc/tomcat11/ssl

sudo systemctl restart tomcat11
Test by pointing your browser at https://localhost:8443
**** UNTESTED Certbot (alternate to self signed)
Certbot will register your server with Lets Encrypt so that external browser access to the OSCAR will be with a green padlock for a trusted connection. This can be done at any time after you have registered a fully qualified domain name (FQDN) eg www.example.org. To install certbot and openssl execute the following
sudo apt install certbotThe recommended approach is to use the webroot as you will not need to shutdown tomcat, just (briefly please) expose its port to the internet so that certbot can check if your FQDN resolves to the server you are asking it to credential. In the following replace FQDN with your the fully qualified domain name that you own.
certbot certonly --webroot -w /var/lib/tomcat11/webapps/ROOT -d FQDNTomcat natively currently operates only on JKS, PKCS11 or PKCS12 format keystores while Certbot saves files in PEM in /etc/letsencrypt/live/://FQDN.
Lets install openssl to convert the format
sudo apt install openssl
Create a folder for the keystore:
sudo mkdir -p /etc/tomcat11/ssl/
Combine the certificates and key into a PKCS12 file:
sudo openssl pkcs12 -export \
-in /etc/letsencrypt/live/://example.com \
-inkey /etc/letsencrypt/live/://example.com \
-out /etc/tomcat11/ssl/keystore.p12 \
-name tomcat \
-CAfile /etc/letsencrypt/live/://example.com \
-caname root
Note: You will be asked to create a password for the PKCS12 store. Remember this password as we will reference it at YOUR_PASSWORD below.
Set proper permissions:
sudo chown -R tomcat:tomcat /etc/tomcat11/ssl/
sudo chmod 600 /etc/tomcat11/ssl/keystore.p12
Open the server.xml file located in the $CATALINA_BASE/conf/ directory.
Locate the <!-- Define a TLS HTTP/1.1 Connector... --> section and add/update the following:
<Connector protocol="org.apache.coyote.http11.Http11NioProtocol"

port="8443" maxThreads="200"

scheme="https" secure="true" SSLEnabled="true"

keystoreFile="/etc/tomcat11/ssl/keystore.p12"

keystoreType="PKCS12"

keystorePass="YOUR_PASSWORD"

clientAuth="false" sslProtocol="TLS"/>
Restart tomcat
sudo service tomcat11 restart
Test by pointing your browser at https://localhost:8443
UNTESTED *****
MariaDB 11.8
OSCAR uses this database to store your data. You can use the latest version of MariaDB obtained with:
sudo apt install mariadb-server mariadb-client libmariadb-javaPhpmyadmin (recommended)
Optionally if you want to install phpmyadmin (basically sudo apt install phpmyadmin choosing lighttpd and the default configuration script) as a MariaDB front end, do it NOW before the next step. The install script will ask you to set passwords, they can both be the same. If you proceed with the complication of using symbols “#,!, &,*, (, ), / , \, = and $” in this password (e.g. pass&word), be sure to escape them when providing them to scripts below where the instructions supply ****** that require it (e.g. pass\&word).
Configuration MariaDB
Run the mysql_secure_installation scipt. Do NOT switch to unix_socket authentication. The root password (for MariaDB) will not be set (it will be blank) unless you ran the phpmyadmin setup. If its not set change it. Feel free to use numbers and letters in your password. If you proceed with the complication of using symbols “#,!, &,*, (, ), / , \, = and $” in this password (e.g. pass&word), be sure to escape them when providing them to scripts below where the instructions supply ****** that require it (e.g. pass\&word).
$ sudo /usr/bin/mariadb-secure-installation
Switch to unix_socket authentication [Y/n] n
Change the root password? [Y/n]
New password:
Re-enter new password:
Remove anonymous users? [Y/n]
Disallow root login remotely? [Y/n]
Remove test database and access to it? [Y/n]
Reload privilege tables now? [Y/n]
Now there will only be the one root user set for MariaDB with the password you provided. Check that MariaDB is working with
$ mysql -uroot -p********Welcome to the MariaDB monitor. Commands end with ; or \g. Your MariaDB connection id is 50 Server version: 11.8.6-MariaDB-3 from Ubuntu -- Please help get to 10k stars at https://github.com/MariaDB/Server Copyright (c) 2000, 2018, Oracle, MariaDB Corporation Ab and others. Type 'help;' or '\h' for help. Type '\c' to clear the current input statement. MariaDB [(none)]> SHOW DATABASES; +--------------------+ | Database | +--------------------+ |information_schema | | mysql | | performance_schema | | phpmyadmin | | sys | +--------------------+ 5 rows in set (0.001 sec)
Building carlos.war
The WAR file can now be built from source. First you need Git
sudo apt install git
Go home.
cd ~
Get the source with
git clone https://github.com/carlos-emr/carlos.git
Then change to the carlos folder
cd carlos
Clear any potential dependency lock issues with
mvn se.vandmo:dependency-lock-maven-plugin:lock
Then build
mvn -Dmaven.test.skip=true -Dcheckstyle.skip=true package
That will take a little while. You can ignore any console output as long as it ends with output something like the following
...
[INFO] ------------------------------------------------------------------------
[INFO] BUILD SUCCESS
[INFO] ------------------------------------------------------------------------
[INFO] Total time: 48.937 s
[INFO] Finished at: 2026-03-24T15:45:40-04:00
[INFO] ------------------------------------------------------------------------
You can test that the build has a war file artifact with
ls -hl target/
total 290M

drwxrwxr-x 2 peter peter 4.0K Mar 24 15:45 antrun

drwxrwxr-x 61 peter peter 4.0K Mar 24 15:45 carlos-0-SNAPSHOT

-rw-rw-r-- 1 peter peter 290M Mar 24 15:45 carlos-0-SNAPSHOT.war

drwxrwxr-x 14 peter peter 4.0K Mar 24 15:45 classes

drwxrwxr-x 3 peter peter 4.0K Mar 24 15:45 generated-sources

drwxrwxr-x 2 peter peter 4.0K Mar 24 15:45 javadoc-bundle-options

drwxrwxr-x 2 peter peter 4.0K Mar 24 15:45 maven-archiver

drwxrwxr-x 3 peter peter 4.0K Mar 24 15:45 maven-status
Building drugref2.war
The WAR file can now be built from source. First return to your home
cd ~
Get the source with
git clone https://github.com/carlos-emr/drugref2026.git
Then change to the drugref folder
cd drugref2026/
Then run
mvn -Dmaven.test.skip=true -Dcheckstyle.skip=true package
this will happen a bit faster and should end like
[INFO] Packaging webapp
[INFO] Assembling webapp [drugref2] in [/home/peter/drugref2026/target/drugref2]
[INFO] Processing war project
[INFO] Copying webapp resources [/home/peter/drugref2026/src/main/webapp]
[INFO] Building war: /home/peter/drugref2026/target/drugref2.war
[INFO] ------------------------------------------------------------------------
[INFO] BUILD SUCCESS
[INFO] ------------------------------------------------------------------------
[INFO] Total time: 12.497 s
[INFO] Finished at: 2026-03-25T08:44:38-04:00
[INFO] ------------------------------------------------------------------------
Installing the Schema for Drugref
$ mysql -uroot -p********Welcome to the MariaDB monitor. Commands end with ; or \g. Your MariaDB connection id is 50 Server version: 11.8.6-MariaDB-3 from Ubuntu — Please help get to 10k stars at https://github.com/MariaDB/Server Copyright (c) 2000, 2018, Oracle, MariaDB Corporation Ab and others. Type ‘help;’ or ‘\h’ for help. Type ‘\c’ to clear the current input statement. MariaDB [(none)]> create database drugref;
then
mysql -uroot -p******** < ~/carlos/release/drugref.sql
Installing the Schema for CARLOS
cd ~/carlos/database/mysql
Lets make all the relevant scripts executable
chmod +x *.sh
We will configure the database for Ontario and call it carlos_1 (use you MariaDB password for ***********)
./createdatabase_on.sh root ********* oscar_mcmaster
THERE MUST BE NO ERRORS! If there are you must wipe the schema with DROP SCHEMA oscar_mcmaster; fix the script and start again.
When done write down or take a screen shot of the username password and pin as they may differ from the below and you will not see them again!
updating character set to utf8
loading oscarinit.sql...
loading oscarinit_on.sql...
loading oscardata.sql...
loading oscardata_additional.sql...
loading oscardata_on.sql...
loading olisinit.sql...
loading icd9.sql...
loading initcaisi.sql...
loading initcaisidata.sql...
loading icd9_issue_groups.sql...
loading measurementMapData.sql...
expiring carlosdoc credentials (set to expire in 1 month for security)
loading oscarinit_2025.sql
all done!
the default user is carlosdoc
password carlos2026
pin 1117
For sec reasons these credentials are set to expire in a month!
Installing the Property Files
There are two property files, one for carlos and one for drugref.
The default one for drugref is found at
src/main/resources/drugref.properties
copy it to tomcat /var/lib/tomcat/carlos.properties
sudo mkdir /var/lib/tomcat
sudo cp ~/drugref2026/src/main/resources/drugref.properties /var/lib/tomcat/drugref2.properties
Edit the properties altering the line db_password= to match that of the MariaDB password you set earlier
sudo nano /var/lib/tomcat/drugref2.properties
The drugref properties file now contains a plaintext password…
so let only tomcat read it
sudo chown -R tomcat:tomcat /var/lib/tomcat/drugref2.properties
sudo chmod 640 /var/lib/tomcat/drugref2.properties
The default one for carlos is found at
src/main/resources/carlos.properties
copy it to tomcat
sudo cp ~/carlos/src/main/resources/carlos.properties /var/lib/tomcat/carlos.properties
Edit the properties altering the line db_password= to match that of the MariaDB password you set earlier
sudo nano /var/lib/tomcat/carlos.properties
The CARLOS properties file now contains a plaintext password…
so let only tomcat read it
sudo chown -R tomcat:tomcat /var/lib/tomcat/carlos.properties
sudo chmod 640 /var/lib/tomcat/carlos.properties
Create Directories
In Debian systems such as Ubuntu, Tomcat is sandboxed to access only certain directory by systemd. To access CARLOS files the tomcat11.service has to be edited to allow for access to the OscarDocument directory. You can edit the system settings for tomcat11 with
sudo systemctl edit tomcat11
This creates a drop-in file (override.conf) instead of editing the main service file. Make the top lines look like the following
### Editing /etc/systemd/system/tomcat11.service.d/override.conf
### Anything between here and the comment below will become the contents of the drop-in file
[Service]
ReadWritePaths=/var/lib/OscarDocument/
Reload with sudo systemctl daemon-reload
You should make the following directories for OSCAR and make tomcat the owner of the base directory so additional directories can be added by CARLOS as required
sudo mkdir /var/lib/OscarDocument/
sudo mkdir /var/lib/OscarDocument/fax-incoming
sudo chown -R tomcat:tomcat /var/lib/OscarDocument
Copy the war files to Tomcat
All that is left is to install the war files
sudo cp ~/carlos/target/carlos-0-SNAPSHOT.war /var/lib/tomcat11/webapps/carlos.war
sudo cp ~/drugref2026/target/drugref2.war /var/lib/tomcat11/webapps/drugref2.war
and have tomcat open them when it restarts
sudo service tomcat11 restart
To check that it loaded the wars you can check Tomcat logs
tail -f /var/lib/tomcat11/logs/catalina.out
You are looking for
[2026-03-27 16:40:12] [info] Deployment of web application archive [/var/lib/tomcat11/webapps/carlos.war] has finished in [27,406] ms
… and you are good!